The Home Renovations Advisor

The Home Renovations Advisor
Shadow box fence is a type of fence that is loved by many homeowners. It is also called as the Good Neighbor fence. It features pickets with spaces in between to allow air to pass through but the opposite side of the picket lines up to block the view enough to offer privacy.
The design is more stylish compared with the regular types and they also hold up well to changes in the weather. Because the price is a major setback, this article will tell you how to build the shadow box fence on your own. This way, you can save considerable amount of money and you can even improve your skills.
Measure Your Yard
The first step in building your fence is to calculate the amount of materials you will need. Start by getting the dimensions of your yard. Bring your calculation to a DIY store or to your construction supplier. Choose your material based on your requirements. it is highly recommended that you get treated wood. Pine is a popular choice, so you may consider this.
Prepare the Post Holes
The post holes serve as the main support of your fence. You may do the job manually using a hole digger or rent a power auger for large yards. Position your post holes every eight feet and at least one foot deep. This will provide sufficient security for the rest of the materials.
Once the holes are set, secure your post by putting quick-setting concrete. Finish the work by placing back the excavated dirt and tamp down the ground from time to time. Use a level to ensure everything is well set and allow the concrete to harden overnight before continuing with the work. The post should be between 6 to 8 feet.
Nail the Stringers
Nail up the stringers to the outside edges of the posts. The lower and top stringer should be one foot from the ground and from the top of the posts. Split the difference and nail up the third stringer in the middle. Check to make sure they are level.
Attach the Pickets
Starting from the inner part of the fence, attach the guide pickets against the posts. Skip one post and nail another picket of the same height. Proceed this way until you finish the inner part of the fence. Do the same procedure for the outside part. There should be an alternating fashion to allow some visibility. The spaces will allow wind to pass through and create shadows against each other.
Finish the Work
One month after the job, use a protective finish to seal the wood. Paint or wood sealer will provide enough protection against adverse weather conditions. The waiting time is crucial to allow the lumber to dry completely.Shadow box fence makes an attractive design because of the changes in the shadows cast throughout the day. The elegant design is achievable by simply following the steps above. Start the project this weekend and be ready for a pleasant surprise.

Fenced Swimming Pool

Protective Swimming Pool Fence

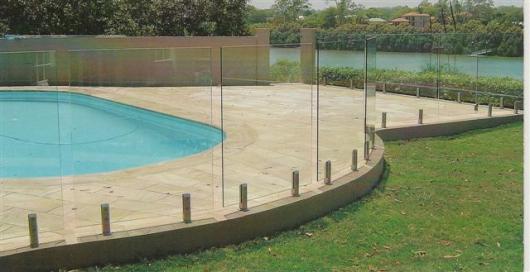
Frameless Swimming Pool Fence
Twilley Lane
Ajax, ON. Canada L1S-7N2
www.thehomerenovationsadvisor.com
647.772.3762
All Rights Reserved. Albert James
Info@thehomerenovations
advisor.com
Articles may not be reproduced in anyway without permission.


Designed by Gomamawebdesign